Step 1 - Measure the angle. |
|
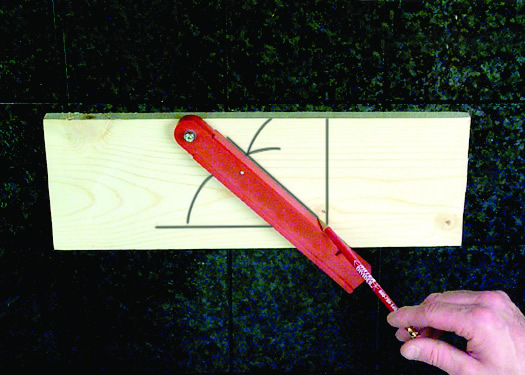
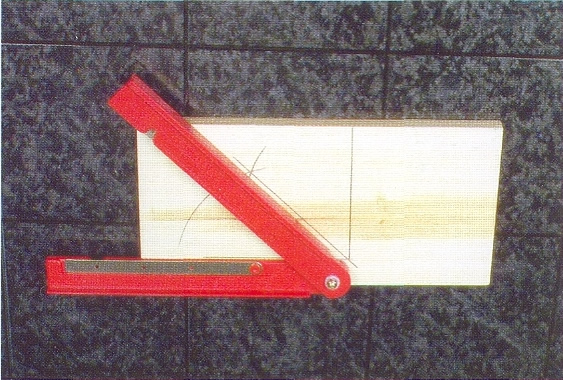
Step 2 - Mark the angle. |
|
|
|
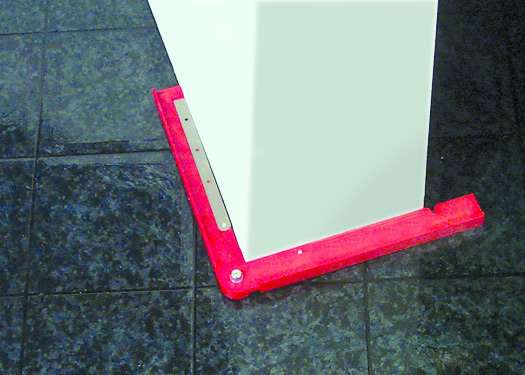
- Place the Miter Divider against the inside or outside corner you want to match.
- Adjust the angle by moving the arms until each arm is flush against the surface.
This process sets the angle onto your Miter Divider. The angle will be held in place by friction. If the joint becomes loose, lightly tighten the nut.
Note: if your corner is too shallow to measure using the Miter Divider, use the Small Angle Tool. |
|
|
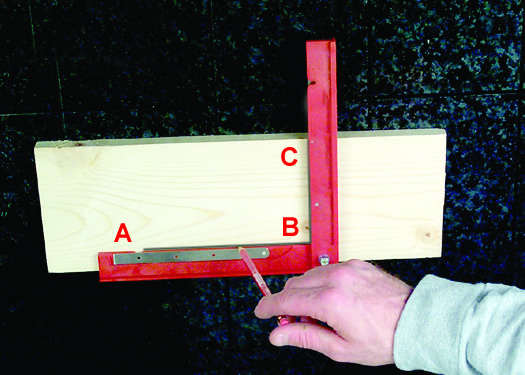
- Transfer the measured angle to a piece of scrap lumber, being careful not to change the angle between the arms.
- The bottom lip of the Miter Divider should line up with and overlap the factory - cut edge of the scrap lumber.
- Trace a line along the inside edge of the Miter Divider starting at point A, to B ending at point C.
|
|
|
Step 3 - Mark the first arc. |
|
Step 4 - Mark the second arc. |
|
|
|
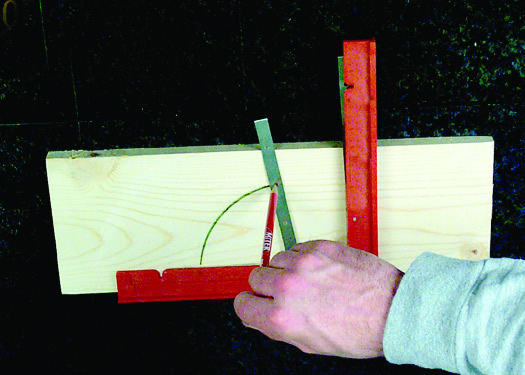
- Place the tip of your pencil into one of the holes along one arm of the Miter Divider.
- Use the attached guide to draw an arc between the two arms. |
|
|
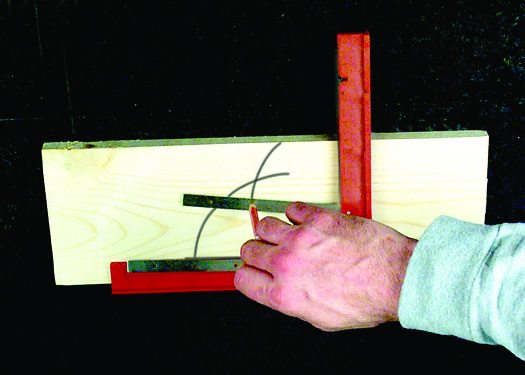
- Place the tip of your pencil in the corresponding hole in the other attached guide and draw another arc making sure both arcs intersect. |
|
|
Step 5 - Mark the cut line / dividing the miter. |
|
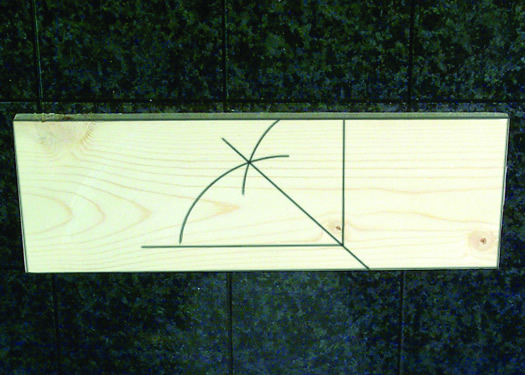
Step 6 - Review your pattern. |
|
|
|
Use the flat edge of the Miter Divider to draw a straight line from the intersection of the two arcs to the corner of the two sides. Continue the line beyond the corner, out to the edge of the lumber. |
|
|
Your scrap lumber should now have a pattern like the one shown here. |
|
|
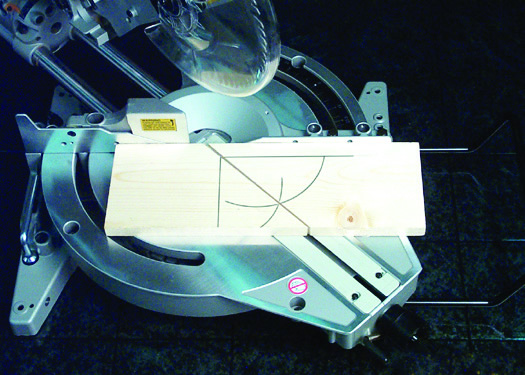
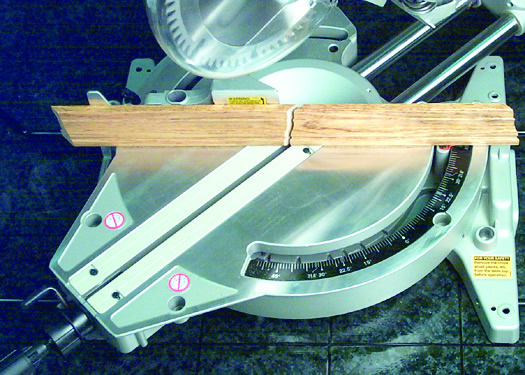
Step 7 - Cut the scrap piece |
|
Step 8 - Test the fit |
|
|
|
Place your scrap lumber as shown in the picture above and set your saw angle. Cut the scrap lumber along the drawn line.
Note: This is the saw angle you will use to cut your final trim pieces, but first, test the fit by cutting the scrap lumber. |
|
|
Flip one of the two cut pieces of scrap lumber over and lay the pieces against eh corner you measured in step one to be sure they match. |
|
|
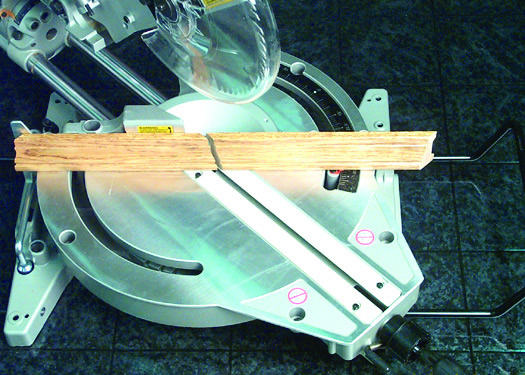
Step 9 - Cut the first trim piece. |
|
Step 10 - Set up the second cut. |
|
|
|
|
Position the trim lumber on the saw and cut, using the angle set in step 7. |
|
|
Using the piece of scrap lumber you flipped over in step 8, set your saw for the second cut of the trim piece. |
|
|
Step 11 - Cut second trim piece |
|
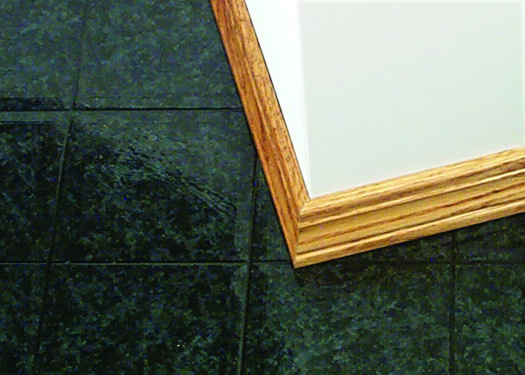
Step 12 - Fit trim pieces |
|
|
|
Position the trim lumber on the saw and cut, using the angle set in step 10. |
|
|
|
|
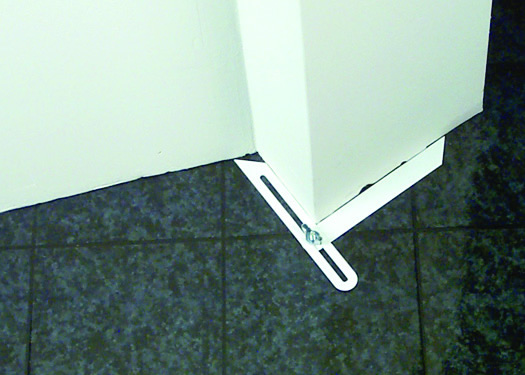
How To Use Your Small Angle Tool
|
Measure the Angle |
|
Transfer the measured angle |
|
|
|
- Place the Small Angle Tool against the inside or outside corner you want to match.
Note: Shorten one arm if needed by sliding the nut in the slot.
- Adjust the angle by moving the arms until each arm is flush against the surface.
- Lock the nut to hold the angle. This sets the angle you need to match onto your Small Angle Tool.
|
|
|
Lay the Small Angle Tool on the outside of the full-size Miter Divider. Align one arm of the Small Angle Tool with one arm of the full-size Miter Divider and hold firmly in place. Rotate the other arm of the full-size Miter Divider to match the angle of the Small Angle Tool. Continue by marking the angle onto a piece of scrap lumber, as shown in the instructions "How To Use Your Miter Divider" |
|
|
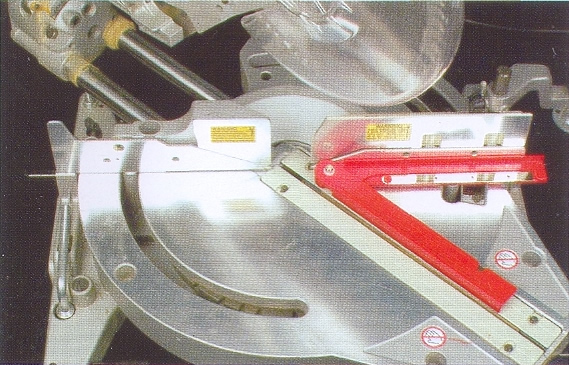
| Use Miter Divider To Set Up Your Saw Angles |
| |
|
|
|
|
|
- The pattern can be drawn on scrap lumber or paper.
- Place the Miter Divider on the center line and one of the side lines. |
|
|
- Place your Miter Divider as shown in the illustration above and set your saw angle for the first cut.
Note: This is the saw angle you will use for the first cut of your final crown pieces.
- Adjust the angle by moving the arms until each arm is flush against the surface. |
|
|
|
|
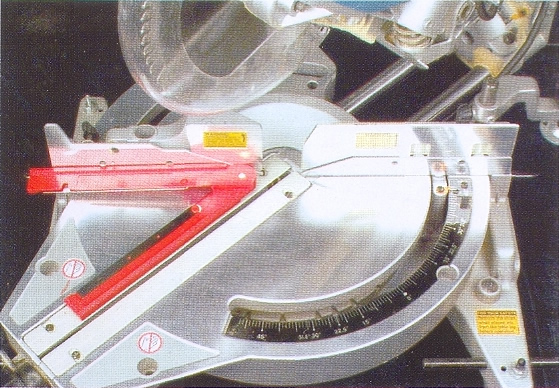
- Flip over your Miter Divider as shown in the illustration and set your saw angle for the second cut
Note: This is the saw angle you will use for the second cut of your final crown pieces. |
|
|
|
| |